You’ll get a clear map of what happens at each visit so you know how the procedure unfolds, who does each step, and how long healing usually takes.
Expect an initial assessment with scans and planning, one or more surgical visits to place the implant, a brief abutment or connector appointment, and a final crown visit—each stage focuses on healing and precise fit to restore function and appearance.
You’ll learn what to prepare for before appointments, how recovery feels after surgery, and what follow-up care keeps your implant healthy for years. This post walks you through the timeline and practical steps so you can move forward with confidence, especially if you are considering dental implants in Anchorage.
Initial Consultation and Assessment
You will meet with the clinician to review your health, oral condition, and practical goals. Expect specific tests and imaging so the team can recommend a safe, predictable plan tailored to your jaw, bone, and schedule.
Comprehensive Oral Evaluation
Your dentist reviews medical history, medications, and any conditions that affect healing—diabetes, smoking, or medications like bisphosphonates. They perform a focused clinical exam of the mouth: gum health, remaining teeth, bite relationship, and soft-tissue health.
The exam includes charting existing restorations and identifying infection, decay, or periodontal pockets that need treatment before implant placement. If you have a failing tooth, the clinician assesses whether extraction with immediate implant is possible or if staged treatment is safer.
Expect basic measurements of ridge width and vertical space. The clinician will also check occlusion (how your teeth meet) to plan the implant position for function and to avoid overload that can cause failure.
Diagnostic Imaging and Planning
You will usually receive a cone‑beam CT (CBCT) scan for 3D assessment of bone volume, density, and proximity to nerves or sinus cavities. The CBCT lets the team measure available bone in millimeters and view cross‑sections of the planned implant site.
Intraoral digital scans or traditional impressions record tooth position and bite relationships. These scans combine with the CBCT for virtual implant placement and surgical guide design when precision is required.
Images reveal whether you need bone grafting, sinus lift, or nerve‑distance adjustments. The clinician uses this data to estimate implant diameter, length, and angulation and to flag potential complications in advance.
Custom Treatment Planning
Your treatment plan lists each step, timing, and responsible clinician—extraction, grafting, implant placement, healing, abutment, and final crown. The plan states material choices (titanium or zirconia implant, type of abutment, provisional prosthesis) and estimated healing windows in weeks or months.
The team provides a cost estimate and scheduling options, and discusses anesthesia choices (local, IV sedation, or oral sedative). You receive pre‑op instructions and a clear aftercare outline, including antibiotics, analgesics, and temporary diet recommendations if necessary.
Finally, the clinician reviews risks, success rates for your specific case, and contingency steps if grafts fail or integration is delayed. You leave with a written plan and answers to any practical concerns about work, travel, or home care.
Dental Implant Surgery Visits
You will go through targeted surgical steps that prepare the site, place the titanium post, and allow the bone to bond to the implant. Each visit focuses on specific tasks: removing problem teeth or diseased tissue, securing the implant, and monitoring healing until the site is stable for the final restoration.
Tooth Extraction and Preparation
If a tooth remains, your dentist or oral surgeon removes it using local anesthesia and, if needed, sedation. The clinician will clean the socket, remove any infection or diseased tissue, and shape the bone to create a stable foundation for the implant.
If bone volume is insufficient, your provider may perform a bone graft at the same visit or schedule it first. Graft materials vary (autograft, allograft, xenograft, or synthetic) and your clinician will explain the choice, healing time, and costs.
You’ll receive instructions for pain control, antibiotics if indicated, and a soft-food diet. Expect swelling and mild discomfort for a few days; follow-up visits confirm soft tissue healing and determine timing for implant placement.
Placing the Dental Implant Post
On the surgery day, the team numbs the area and may offer oral or IV sedation if you prefer. A small incision exposes the bone, a pilot hole is drilled to precise depth and angulation, and the titanium implant is inserted and torqued to the planned tightness.
Surgeons often use computer-guided templates or CBCT (3D) imaging to place the post exactly where the crown will sit. Your clinician will note implant size, length, and initial stability, and document these details for the prosthetic phase.
After placement, the surgeon either covers the implant with gum tissue (submerged healing) or attaches a healing abutment (non-submerged). You’ll get postoperative instructions on oral hygiene, medication, and activity restrictions, plus a follow-up to check the incision.
Healing and Osseointegration
Osseointegration is when your jawbone grows tightly around the implant surface, typically taking 3–6 months depending on bone quality and location. Upper jaw implants generally take longer than lower jaw ones; your clinician will assess progress at scheduled visits.
During healing, you’ll maintain gentle cleaning around the site and avoid heavy chewing on that side. Periodic X-rays verify bone contact and rule out complications like infection or inadequate integration.
If integration is successful, the provider uncovers the implant if it was submerged and places a final or temporary abutment to shape the gum for the crown. Any issues—persistent mobility or infection—prompt additional treatment such as revision surgery or extended healing time.
Abutment Placement and Restoration
This stage connects the implanted post to your visible tooth replacement and establishes the final shape and color that will match your bite and neighboring teeth.
Attaching the Abutment
Your dentist will first confirm the implant has fused to bone through clinical checks and possibly an x‑ray. You’ll receive a local anesthetic before the gum over the implant is gently reopened or a small incision is made.
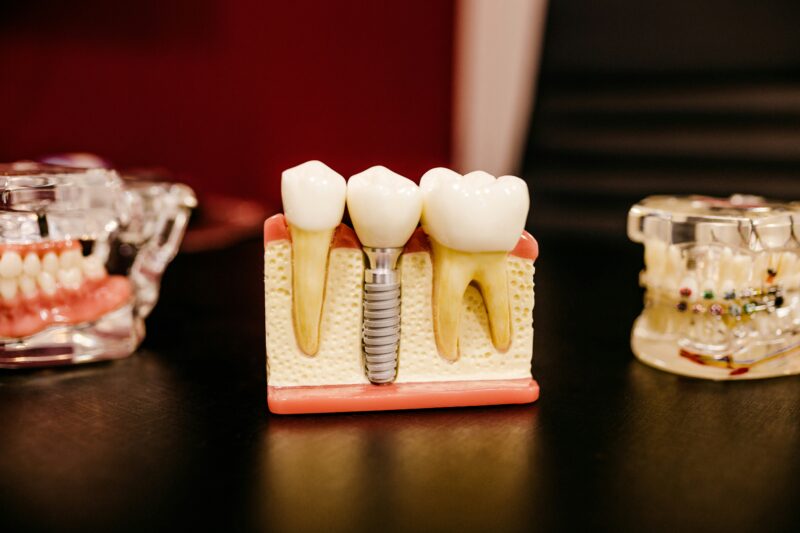
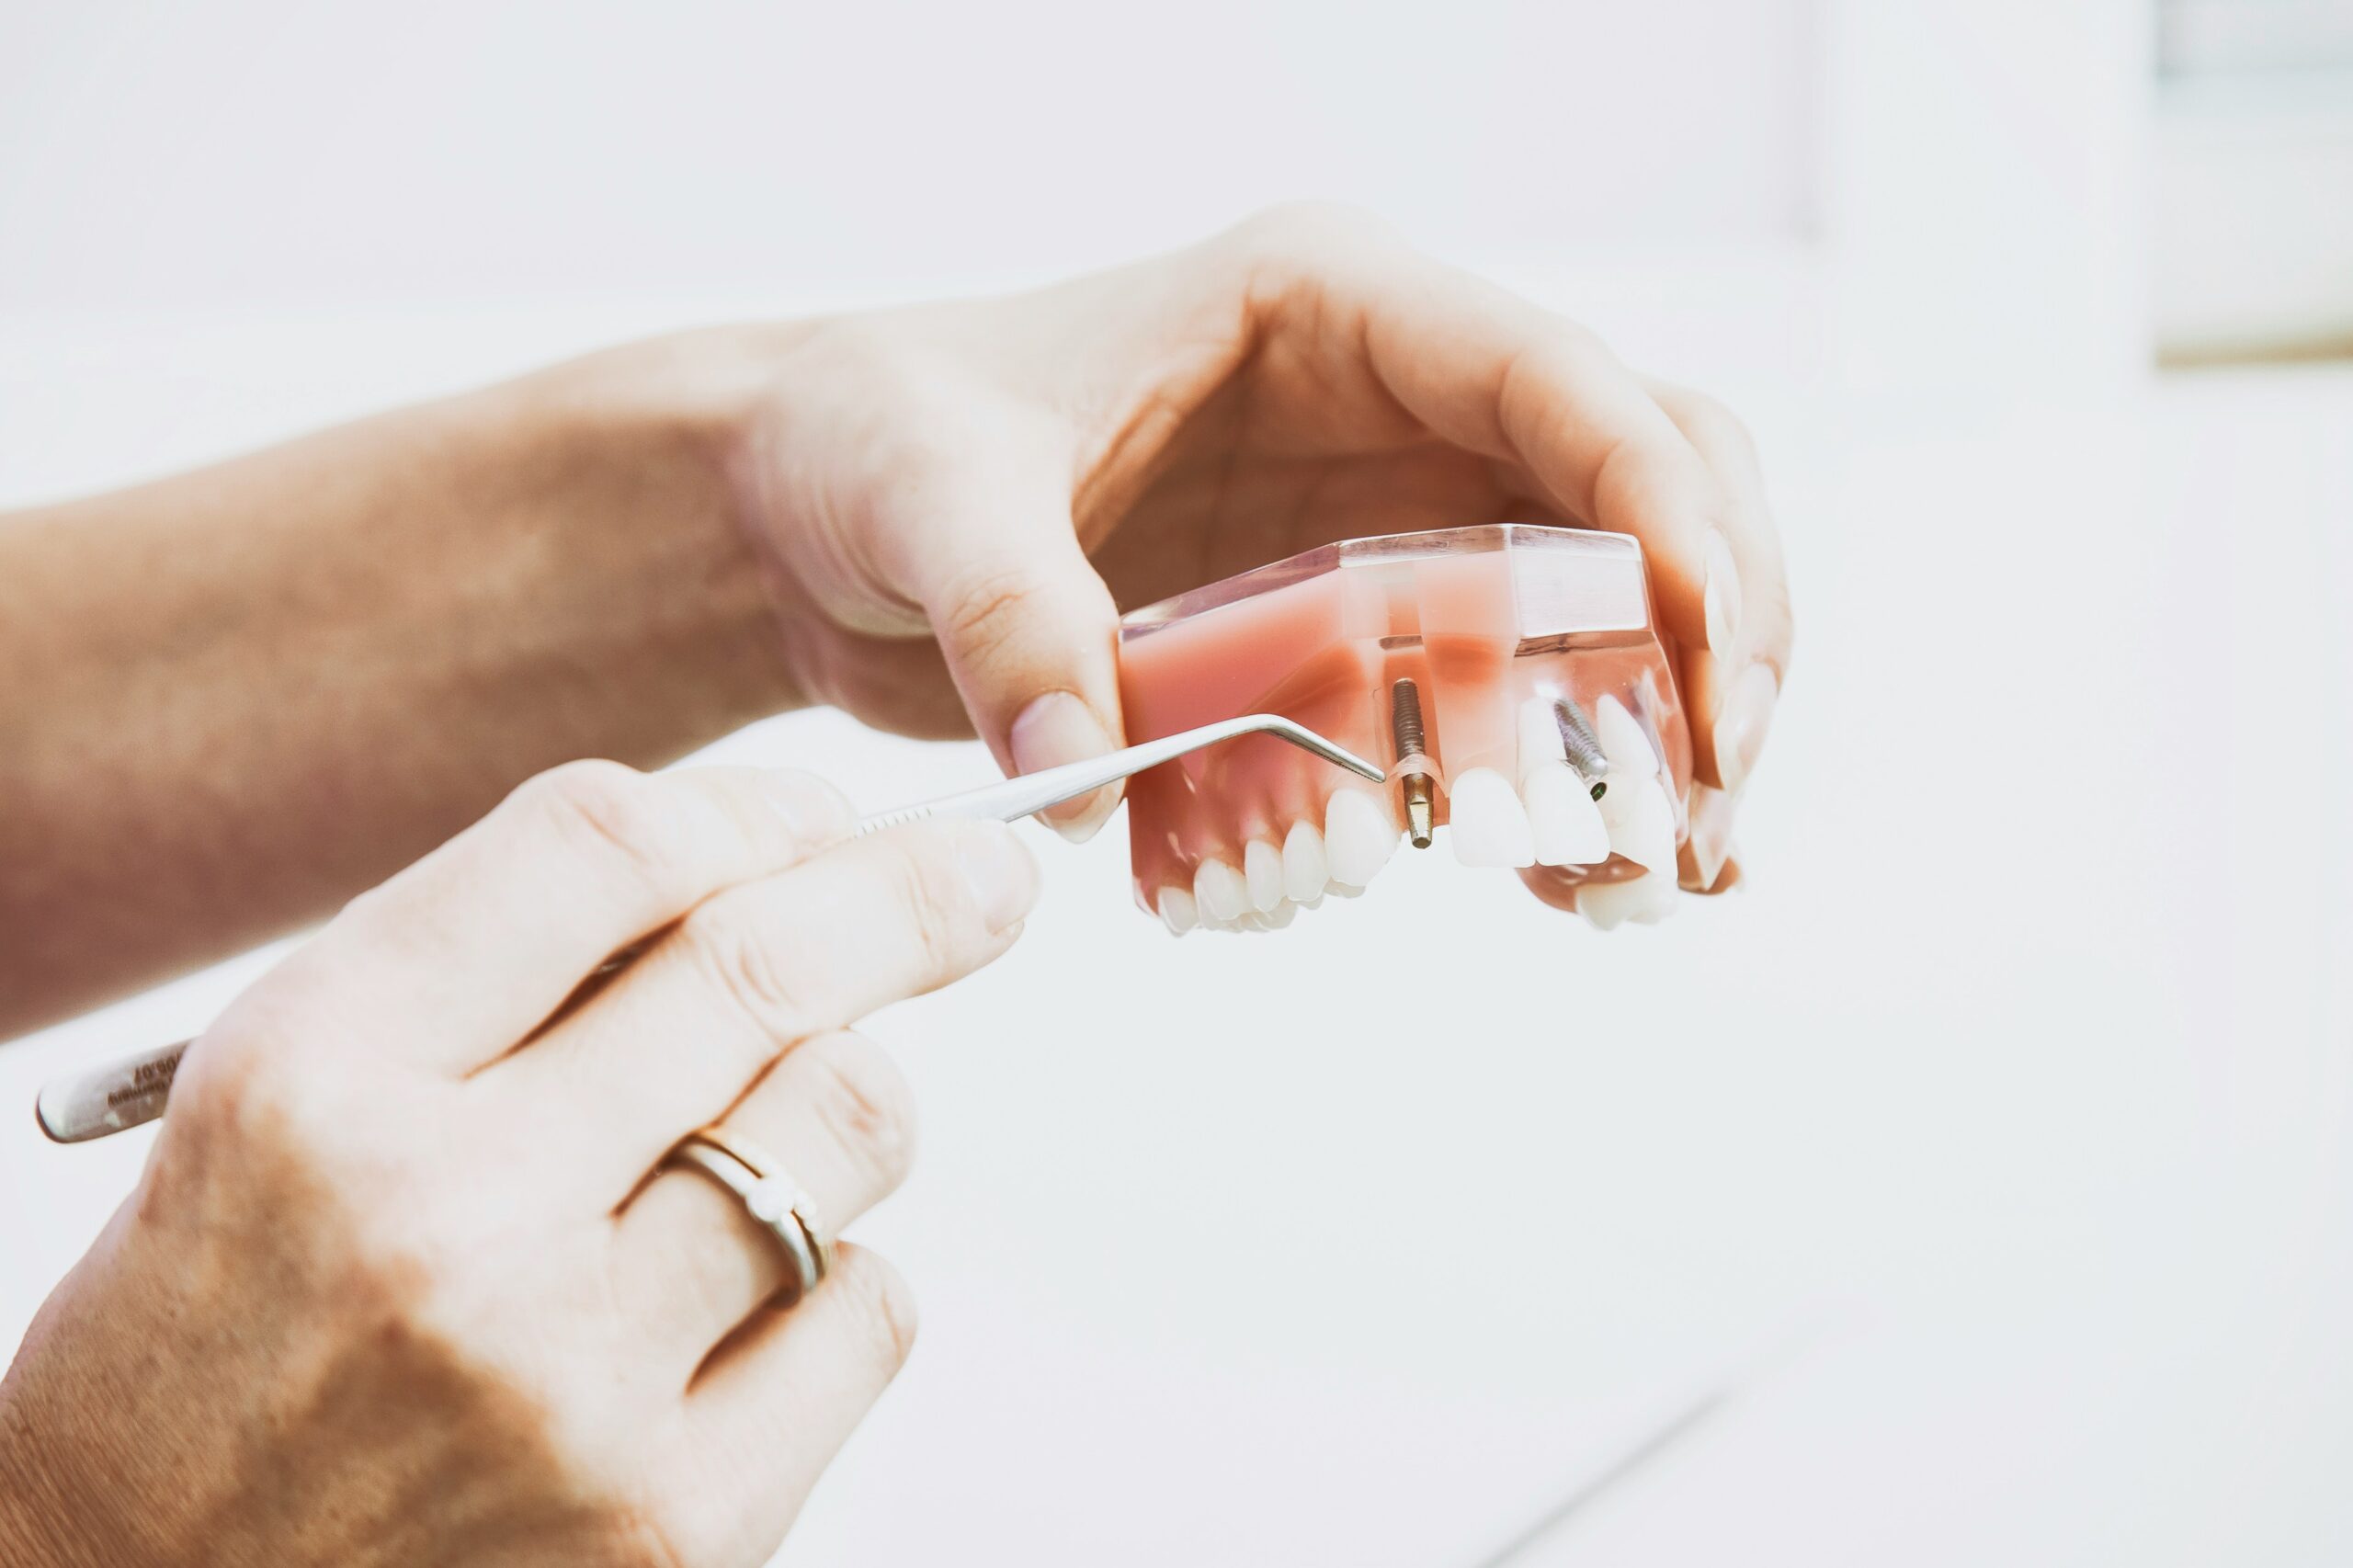
The abutment, a metal or ceramic connector, gets attached to the implant post and secured with a screw. Your clinician will check abutment height and angulation so the crown will align properly with adjacent teeth and your bite.
If a healing collar is used, it guides gum tissue to form a natural emergence profile. You may have mild soreness for a few days; follow prescribed pain control and oral hygiene instructions to avoid infection.
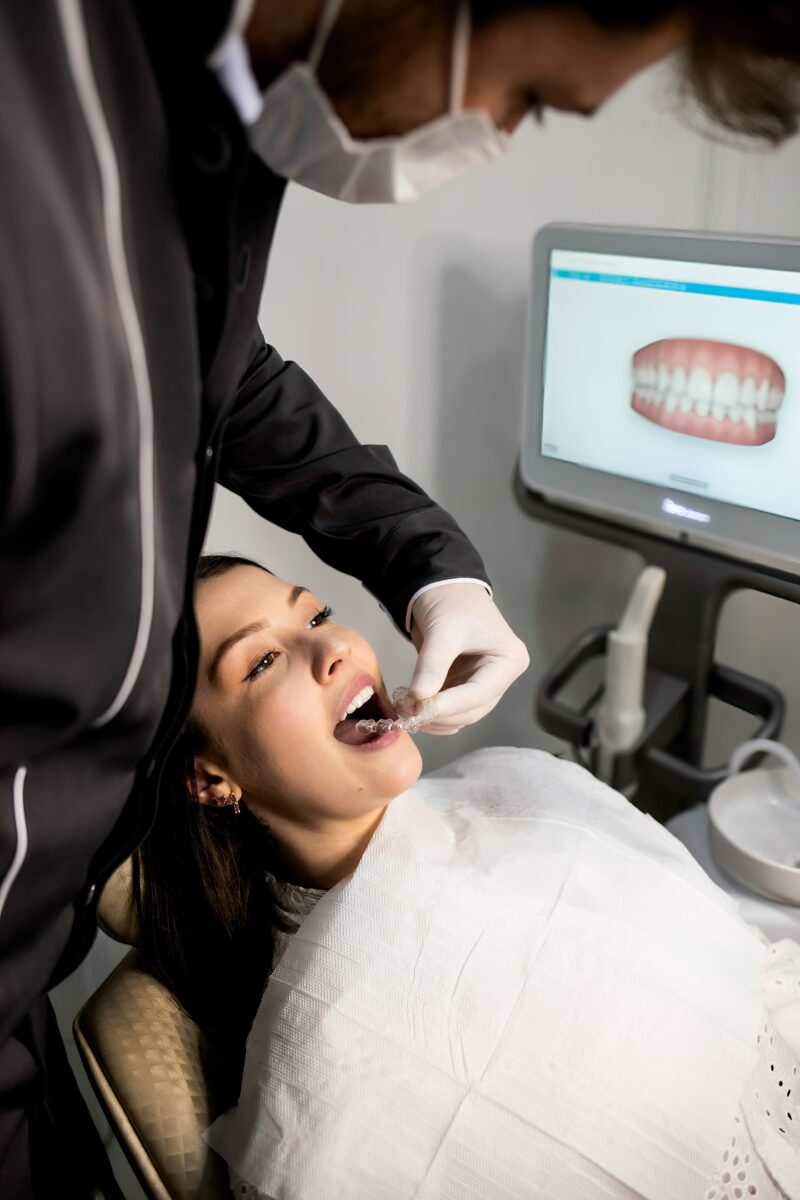
Taking Impressions for the Crown
After the abutment sits correctly, your dentist takes precise records of the implant position and surrounding teeth. They use one of these methods: digital intraoral scans for a 3D model or traditional polyvinyl siloxane (PVS) impressions with trays.
Laboratory technicians use those records to fabricate a custom crown that matches shape, size, and shade. Your clinician will note occlusion (how teeth meet), soft‑tissue contours, and neighboring tooth color to communicate to the lab.
If needed, a temporary crown may be placed while the permanent restoration is made. Expect the lab turnaround to vary from a few days to a few weeks depending on materials and complexity.
Fitting and Placement of the Dental Crown
When the permanent crown returns, your dentist verifies fit, color, and bite in the mouth. They check margins, contacts with adjacent teeth, and occlusion in both static bite and chewing motions.
The crown is either cemented onto the abutment or screwed into the implant, depending on the design. If screw‑retained, the access hole is filled with composite and polished; if cemented, excess cement is carefully removed to prevent gum irritation.
Your clinician confirms you can chew comfortably and will give care instructions—avoid hard foods for a short period and maintain regular brushing, flossing around the implant, and dental checkups to monitor the restoration.
Aftercare and Long-Term Maintenance
Follow specific wound care, medications, diet restrictions, and cleaning steps in the first days. Expect scheduled follow-up visits and long-term hygiene routines to protect the implant and surrounding bone.
Post-Procedure Care Instructions
You will receive a prescription for pain medication and, often, a short course of antibiotics; take them exactly as directed. Use ice packs on the cheek for 10–15 minutes at a time during the first 24 hours to reduce swelling, then switch to warm compresses after 48 hours if needed.
Eat soft foods for 7–14 days: yogurt, mashed potatoes, smoothies (use a straw cautiously). Avoid hard, crunchy, or sticky foods on the implant side until your clinician clears you. Do not smoke or use nicotine for at least two weeks; nicotine delays bone healing and raises failure risk.
Avoid vigorous rinsing or spitting for 24 hours. After 24 hours, rinse gently with salt water (1/2 teaspoon salt in 8 oz warm water) 3–4 times daily. Follow any suture-care instructions and return for suture removal when scheduled.
Monitoring Healing Progress
You should expect mild pain and swelling to improve within 7–10 days; increasing pain, spreading redness, fever, or pus require immediate contact with your provider. Your clinician will schedule visits to check soft-tissue healing and take X-rays to confirm implant integration at 3–6 months depending on your case.
Keep a symptom log: pain level, swelling, temperature, and any discharge. Bring this log to follow-ups if healing stalls. If loose components, persistent numbness beyond a few weeks, or a change in bite occur, call your dentist promptly.
Maintaining Oral Hygiene
Brush twice daily with a soft-bristled brush; use a low-abrasive toothpaste to avoid scratching the crown. Floss once daily—use implant-specific floss, floss threaders, or interdental brushes (0.5–1.5 mm depending on space) to clean around the abutment and under the crown margin.
Use an antimicrobial mouthwash (chlorhexidine for short-term use if prescribed) or a fluoride rinse as recommended. Schedule professional cleanings every 3–6 months initially; your dentist may extend intervals once tissue health is stable. Inform your hygienist that you have implants so they use non-abrasive instruments and targeted techniques.