Making a cream eye shadow base is a great way to create a unique and personalised look for your makeup. Before you can get started, it’s important to have all the right materials ready. Below you will find a list of the items you will need to make a cream eye shadow base. Gather your materials and get ready to get started.
How to make cream eyeshadow
Creating a cream eye shadow base is easy with the right materials. Here is what you will need:
-1 tablespoon of paraffin wax
-1 tablespoon of jar or beeswax
-2 tablespoons of oil (coconut, olive, castor, or other light oil)
-Several drops of a colour additive such as one made from cosmetic grade mica.
-A metal or glass bowl for mixing and storing your cream base
-Double boiler in which to melt the waxes
-New plastic container for storage after use (not metal)
Optional extras that can help when making and using your cream eyeshadow base:
-Stirring stick (wooden spoon or Popsicle stick) and plastic spoon(s) for scooping any extra powder additives
-Aluminum Foil to cover unheated eyeshadow containers while setting
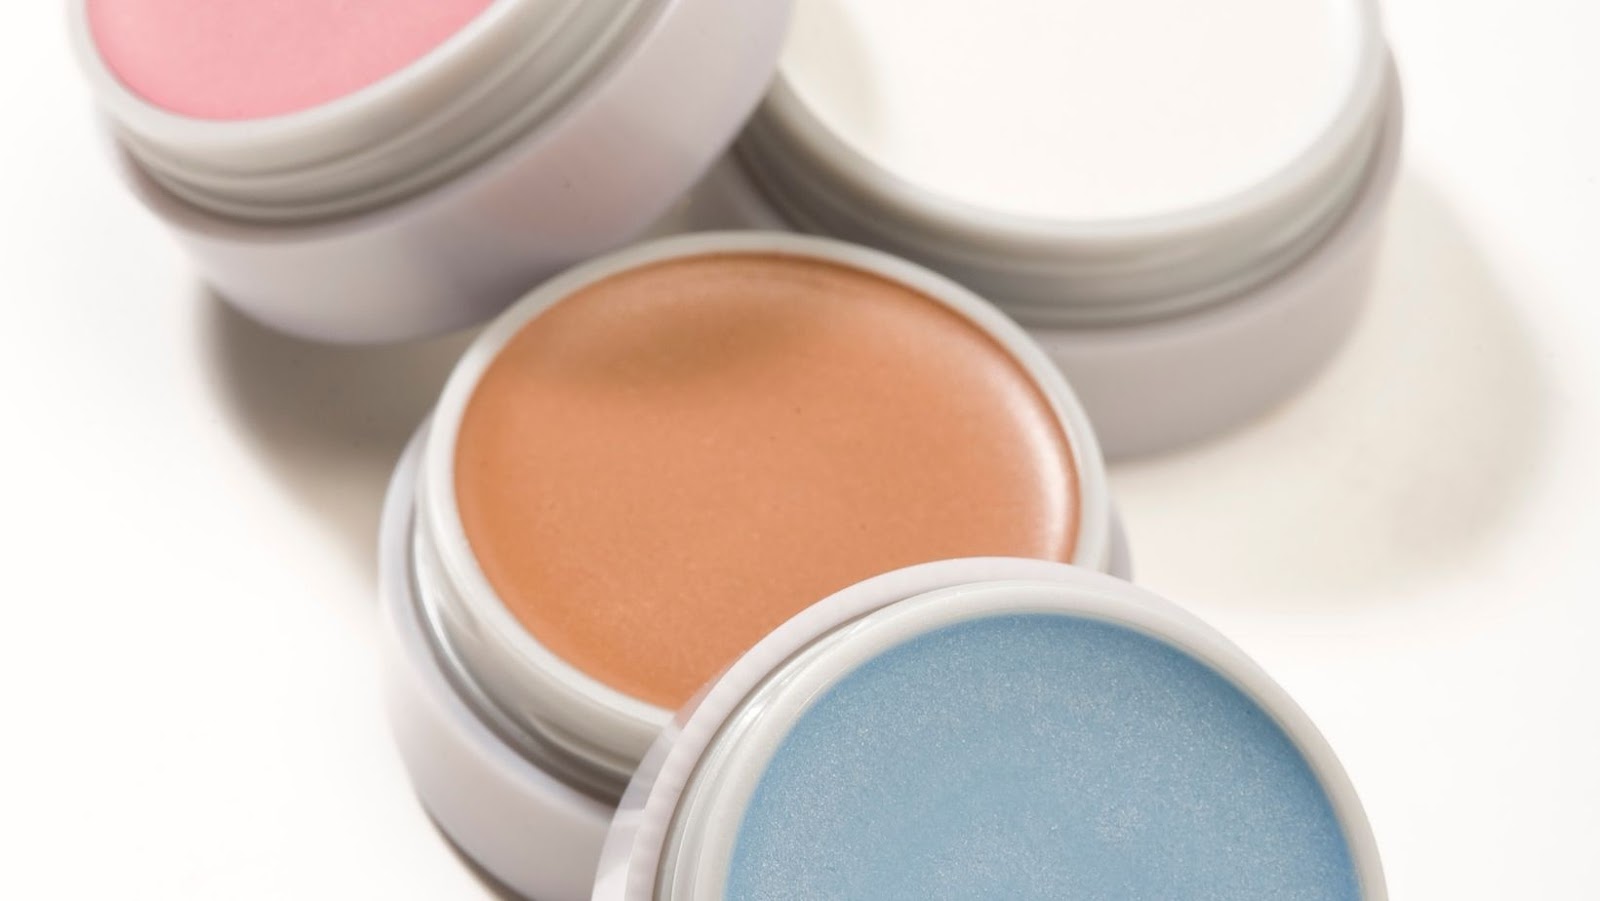
Cream eyeshadow
Cream eye shadow is a great way to bring bright and bold colours to your makeup routine. With just a few readily available items and some simple instructions, you can make your own cream eyeshadow right at home. Here’s the materials you need to get started:
-Eyeshadow base (refined cocoa butter, candelilla wax, Shea butter, jojoba oil and EU compliant preservative)
-Eyeshadow colour (cosmetic grade pigments)
-Small microwaveable container
-Heat safe bowl
-Mixing spoon or spatula
-Small glass pot or jar with lid for storage
-Infrared thermometer (optional but recommended)
Mixing bowl
You will need a mixing bowl to combine the ingredients for creating your cream eye shadow base. Choose one that is made of ceramic, glass, metal e.g. stainless steel, or plastic for easier cleaning and storage. The size of the bowl should depend on the proportions you want to make; the bigger the batch you are making, the bigger your mixing bowl should be – it is important to ensure that there is enough room for stirring without spilling any of your ingredients over the edges of your bowl. Additionally, as you mix in other powder pigments/shimmer/mica or glitter into your eye shadow base later on in this process, it will be essential to have an appropriately-sized bowl so that all powders blend uniformly without mess or wastage.
Preparation
Creating a base for your homemade cream eye shadow is one of the first steps in the process. This base will act as a primer and a canvas for the eye shadow that you will add later on. It is important to take the time to properly prepare the base in order to ensure that the eye shadow will be of the highest quality. The base that you make can be used multiple times and it should give you consistent results each time. Here is a step-by-step guide on how to make a cream eye shadow base.
Measure the eye shadow base
To begin making the cream eye shadow base, you will need to measure out the wax and oils. Use a kitchen scale for accuracy. Traditional cream stick formulas may range from 2 parts beeswax to 3 parts petroleum jelly, with 1 part oil. The oil may include almond, jojoba or castor oil. Begin by measuring out 1 ounce (28 g) of beeswax, to which you can then add 28 g of petroleum jelly and 14 g of oil.
Make sure that while you’re measuring out these ingredients, they are all in liquid states (e.g., if the beeswax is hard, warm it up first). Once all the ingredients are measured properly, move on to melting them before adding your colour pigments.
Measure the cream eye shadow
The first step in making a cream eye shadow base is to measure out the ingredients. It’s important to use precise measurements to ensure that the cream eye shadow has the right consistency. Gather four teaspoons of beeswax and melt it into a double boiler. Remove the mixture from heat and stir in 30 millilitres of jojoba oil, then whisk until combined. Add three tablespoons of shea butter and blend until fully incorporated; this will provide more stability to your cream formula and add skin conditioning properties. Stir in 15 millilitres of vegetable glycerin until fully combined, which will help maintain skin hydration while using the cream eye shadow base. Finally, mix one teaspoon of cosmetic grade mica powder into the mixture for colour payoff and texture. Make sure all ingredient measurements are accurate for optimal results!
Place the ingredients in the mixing bowl
To begin making the eye shadow base, place 1 tablespoon of beeswax, 1 teaspoon of coconut oil and 1 teaspoon of shea butter in a glass heat-resistant bowl. For a deeper colour, replace the beeswax with 2 tablespoons of cocoa butter; however, cocoa butter can turn the cream eye shadow into more of a paste than a cream. Place the bowl on top of the saucepan with some simmering water so that it never touches the water. Stir until all ingredients have melted and combined together to form an even mixture.
Mixing
Making cream eyeshadow requires a good eye shadow base–something that will provide a smooth, even canvas for your eyeshadow. Mixing the ingredients in the base is key to getting the perfect result. In this section, we’ll go over the basics of mixing together the ingredients for the eye shadow base. You’ll learn about the tools you need and the different types of bases you can make.
Use a spoon to mix the ingredients together
Once you have your base ingredients ready, it’s time to mix them together. The best tool for this is a clean stainless steel spoon. This can help ensure that the colours and consistencies blend together evenly. Start by spooning a small amount of each ingredient together onto the bowl or surface you are using— typically a heavy glass, ceramic or plastic container works best. To combine each ingredient thoroughly, use a back-and-forth sweeping motion to slowly blend them in the container until they are fully combined and the consistency is smooth.
The key to success during this step is patience! Take your time while slowly mixing everything together and be sure not to move too quickly as it takes some time for all of the ingredients to fully distribute within the base mixture. The mixture should also stay smooth throughout and retain its original colour until it all comes together into one, cohesive mass at the end of your mixing process. Be sure to take note of how much you use for each ingredient – adding too much or too little of one component may result in a product that does not perform as expected when applied on skin later on down the line.
Scrape the sides of the bowl to ensure everything is mixed evenly
Once the ingredients are combined in the mixing bowl, you will need to scrape the sides of the bowl to make sure that everything is mixed together in an even consistency. Use a rubber spatula or a spoon to scrape along the edges of your bowl. Make sure that there are no lumps or clumps remaining and that all of the ingredients are thoroughly combined. This will help create a smooth, consistent eye shadow base that applies evenly and blends well with other colours used in your makeup look.
Finishing
The final step in making your own cream eye shadow base is to finish it off properly. This is often done with a few simple techniques that will help create the perfect base and the desired look. We will cover the different techniques on how to finish off the eye shadow base, and explain their importance in the overall eye shadow look.
Place the mixture into a container
Once the mixture is evenly blended and creamy, use a spoon to transfer it into a container. While any small container can be used, choosing a readily available shallow plastic or metal tin is often ideal for easy application of the eye shadow. Once the mixture is transferred, press it down firmly so that it fits into the corners and completely fills the tin with an even layer. Allowing some excess will make handling easier after it has firmed up in the refrigerator.
After pressing the mixture down into an even layer, place the container in either your refrigerator or freezer until it sets; this should take between 30-60 minutes. After this amount of time has passed, remove your eye shadow from its container and enjoy!
Store in a cool, dry place
Once your cream eyeshadow base is blended, it’s important to store it in a cool, dry place. This will maintain the consistency of the product and help to keep it from separating or melting in warmer temperatures. To successfully store your cream eyeshadow base, make sure to place it in an airtight container and label the container with the name and date of your homemade product. Alternatively, you can also choose to store your eyeshadow base in a cool area like a refrigerator or freezer if you are looking for longer term storage solutions. Once you are ready to use your homemade eyeshadow, let it sit at room temperature before using. Doing this will ensure that your shadow will have optimal texture and pigmentation when applied and blended onto the skin.
Use within two weeks
Once the base has been prepared, it should be stored in a cool and dry place away from light and heat. As the eye shadow base contains water, it is best to use it within two weeks of its preparation. It is important to take the right steps when storing an eye shadow base, as any contamination can lead to spoilage or chemical reactions. Before using the eye shadow base, check that there are no signs of spoilage such as discoloration or smell. To further elongate its shelf life, this preparation can be refrigerated for up to one month, but should come back to room temperature before use.